
Flash Pi OS Lite to a micro SD card.
Install Webmin
If you like to install and update Webmin via APT, edit the /etc/apt/sources.list file on your system and add the line:
deb https://download.webmin.com/download/repository sarge contrib
You should also fetch and install the Webmin GPG key with which the repository is signed, with the commands:
wget https://download.webmin.com/jcameron-key.asc
sudo apt-key add jcameron-key.asc
You will now be able to install with the commands:
sudo apt-get install apt-transport-https
sudo apt-get update
sudo apt-get install webmin
All dependencies should be resolved automatically.
Once installed, log into Webmin and go to System > Disk and Network Filesystems and create a EXT4 filesystem on your external drive if you haven’t already done so. Then modify the fstab file to automatically mount the external HDD by adding the following lines:
# Mount external drive containing home directories on boot.
/dev/sda1 /media/external ext4 defaults 0 0
Reboot and then create a folder called ‘home’ on the external drive. Then add the following lines to the fstab file to bind the home folder to the one on the external drive:
/media/external/home /home none bind
If you will be running a TFTP server, then also add the following to fstab:
# Create NFS export folder.
/media/external/tftpboot	/export/tftpboot	none	bind
Then install the ‘nfs-kernel-server’ and ‘tftpd-hpa’ packages and modify /etc/default/tftpd-hpa to the following:
TFTP_USERNAME="tftp"
TFTP_DIRECTORY="/media/external/tftpboot"
TFTP_ADDRESS=":69"
TFTP_OPTIONS="--secure --create"
Also, add the following lines to your /etc/exports file:
# to NFS clients. See exports(5).
/export/tftpboot 192.168.1.0/255.255.255.0(async,rw,insecure,no_root_squash,fsid=[UUID of external drive using command blkid])

# NFSv4 – pseudo filesystem root
/export 192.168.1.0/255.255.255.0(no_subtree_check,fsid=0,ro)
Then apply the changes with the following:
$ exportfs -ra
You will need to create a folder called tftpboot on the external HDD and change the owner and group for it to tftp. Once this is done, go ahead and restart the tftpd-hpa service. See Network Booting Raspbian Lite to a Raspberry Pi 4 from a Synology NAS or Network Booting LibreElec to Raspberry Pi’s from a Synology NAS for more help on setting up a TFTP server.
You can also install ProFTP server by entering the following:
$ sudo apt-get install proftpd
$ sudo echo “/bin/false” >> /etc/shells
$ sudo nano /etc/proftpd/proftpd.conf
Look for the line that contains DefaultRoot and uncomment it by removing the “#” from it. Save the file but leave the SSH connection open as there is one more thing we need to do. Let’s go to webmin. Go to Webmin > System > Users and Groups, and select “Create a new user. Provide a username for what is to be the FTP account. As “Home directory” select “Directory” and press the button to show the folders in your server. Select the /var/www/yourdomain folder you previously created or whatever folder you want the ftp account to login into. Select the “Shell” /bin/false. Select “Normal Password” and provide a unique, complex password for the account. Select “New group with same name as user” for the primary group.
Disable:
- Create home directory
- Copy template files…
- Create user in other modules
Click on “Create”. It will complete the process and take you back to the users list page. Go back to the SSH console and run the following:
$ sudo chown username /var/www/yourdomain (folder you previously created or whatever folder you want the ftp user to own)
Now exit the SSH console and try your new username with your favorite FTP Client.
You may want to configure sending email by going to Webmin > Webmin Configuration > Sending Email and select to send email via SMTP to remote mail server and enter your email server address. Also, change SMTP SSL encryption to ‘Always use TLS’. Enter your email address and password for SMTP server authentication and choose ‘Login’ for SMTP authentication method. Click the ‘Save’ button and go back and try to send a test email.
You may also want Webmin to notify you when there’s a hard disk failure. To set this up, go to Webmin > Tools > System and Server Status and add a monitor of type ‘SMART Drive Check’. This will require package ‘smartmontools’ to be installed. Select the hard disk that you want to monitor and then click on the ‘Save’ button.
Install Nginx
First, let’s install NGINX onto our Raspberry Pi by running the following command on your Raspberry Pi.
sudo apt-get install nginxNow with NGINX installed, we can now start up the software. So let’s type the following command into terminal to start up the web server on your Raspberry Pi.
sudo systemctl start nginxNGINX places an HTML file under the web folder. As such, you can test if NGINX installed properly by navigating to http://localhost/ or http://[YOUR RASPBERRY PI'S IP ADDRESS]/.
To view your IP address, you may run the command hostname -I.
hostname -IIf installing NGINX on the Raspberry Pi went as planned, you’ll see a friendly “Welcome to nginx” message when you navigate to http://localhost/ in a browser.
Unlike Apache, NGINX won’t be automatically set up for use with PHP. We instead must make changes to its configuration files to get it to load in. We will also have to utilize PHP-FPM and not standard PHP due to the way NGINX works.
Before we get started with configuring PHP for NGINX, we need to go ahead and install PHP 7.4 and some recommended PHP modules that will make it easier when dealing with more extensive PHP scripts. Before you run the command below, make sure that you are running Pi OS Bullseye or newer.
sudo apt-get install php7.4-fpm php7.4-mbstring php7.4-mysql php7.4-curl php7.4-gd php7.4-curl php7.4-zip php7.4-xml php7.4-intl php7.4-gmp php7.4-bcmath php7.4-imagick libmagickcore-6.q16-6-extra pwauth smbclient -yWith PHP-FPM now installed we can make the required modifications to the default NGINX configuration file.
To begin editing the default configuration file run the following command on your Raspberry Pi.
sudo nano /etc/nginx/sites-enabled/defaultWithin this file, find and replace the following lines.
Find
index index.html index.htm;Replace With
index index.php index.html index.htm;Here we need to add index.php to the index line, and this tells NGINX to recognize the index.php file as a possible index, adding it first in the list means it will be selected over an index.html file.
Find
#location ~ \.php$ {
        #       include snippets/fastcgi-php.conf;
        #
        #       # With php7.4-cgi alone:
        #       fastcgi_pass 127.0.0.1:9000;
        #       # With php7.4-fpm:
        #       fastcgi_pass unix:/var/run/php/php7.4-fpm.sock;
        #}
Replace With
location ~ \.php$ {
               include snippets/fastcgi-php.conf;
               fastcgi_pass unix:/var/run/php/php7.4-fpm.sock;
        }
This code sets up NGINX to process .php files by passing them through to PHP-FPM.
Once done, you are able to save and exit by pressing CTRL +X and then pressing y and then enter.
Next, in this Raspberry Pi Nginx server tutorial, we will need to tell NGINX to reload its configuration by running the following command.
sudo systemctl reload nginxFinally, let’s test the PHP setup by writing a very simple index.php file in our /var/www/html directory. Run the following command to create and begin editing our index.php file.
sudo nano /var/www/html/index.phpThen add the following line of code.
<?php phpinfo(); ?>Once that is all done, we can save and exit by pressing CTRL + X then Y and lastly Enter.
Also, we need to enable Alternative PHP Cache (APC) by adding the following lines to /etc/php/7.4/mods-available/apcu.ini:
apc.enabled=1
apc.shm_size=32M
apc.ttl=7200
apc.enable_cli=1
Once that is all done, we can save and exit by pressing CTRL + X then Y and lastly Enter.
Next, in order to prevent session corruption when using Redis as your session handler we need to add the following lines to /etc/php/7.4/mods-available/redis.ini:
redis.session.locking_enabled=1
redis.session.lock_retries=-1
redis.session.lock_wait_time=10000
Once that is all done, we can save and exit by pressing CTRL + X then Y and lastly Enter.
Next, we want to enable OPcache which is a type of caching system that saves precompiled script bytecode in a server’s memory called a cache, so each time a user visits a web page, it loads faster. To accomplish this, add the following lines to /etc/php/7.4/mods-available/opcache.ini:
opcache.enable=1
opcache.enable_cli=1
opcache.interned_strings_buffer=16
opcache.max_accelerated_files=10000
opcache.memory_consumption=128
opcache.save_comments=1
opcache.revalidate_freq=1
Once that is all done, we can save and exit by pressing CTRL + X then Y and lastly Enter.
Hopefully, by now you have successfully set up your Raspberry Pi with a fully functional NGINX web server with PHP working correctly.
Install Nextcloud
If you want to use a database server, then set one up in Webmin using the MySQL Database Server module. Also, be sure to change the administration password!
In this tutorial, we will secure nextcloud using the free SSL certificate from Letsencrypt, and we will generate certificates files using the letsencrypt tool.
If you do not have a domain name or install nextcloud on the local computer, you can generate the Self-Signed certificate using OpenSSL.
Install the ‘letsencrypt’ tool using the apt command below.
$ sudo apt install certbot -y
After the installation is complete, stop the nginx service.
$ sudo systemctl stop nginx
Next, we will generate the SSL certificates for our domain name ‘nextcloud.example.com’ using the cerbot command line. Run the command below.
$ sudo certbot certonly --standalone -d nextcloud.example.com
You will be asked for the email address, and it’s used for the renew notification. For the Letsencrypt TOS agreement, type ‘A’ to agree and for the share email address, you can type ‘N’ for No.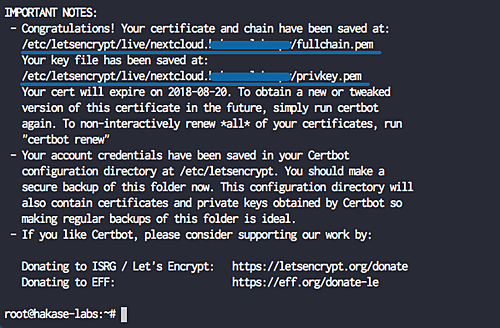
When it’s complete, you will get the result as shown below.

The SSL certificates Letsencrypt for the netxcloud domain name has been generated, all located at the ‘/etc/letsencrypt/live/nextcloud.example.com’ directory.
Now change the permissions of /var/www/html to be owned by the web server, then copy the setup-nextcloud.php to that folder and open it in your web browser.
$ sudo chown -R www-data:www-data /var/www/html
Install the web files to the current directory by entering a ‘.’ and click on the ‘Next’ button. Then create an admin user and choose where to create the data folder. This folder will need to be owned by the web server as well. In the database section, enter ‘root’ for the user, the administrative password that you entered earlier for the password, and nextcloud for the database. Then click on ‘Next’. The script will now try to take you to the recommended apps page, but it will just get a 404 Not found page because we still need to configure the nginx virtual host for Nextcloud.
Go to the ‘/etc/nginx/sites-available’ directory and create a new virtual host file called ‘nextcloud’.
cd /etc/nginx/sites-available/
sudo nano nextcloud
There, paste the following nextcloud virtual host configuration.
upstream php-handler {
    #server 127.0.0.1:9000;
    server unix:/var/run/php/php7.4-fpm.sock;
}

# Set the `immutable` cache control options only for assets with a cache busting `v` argument
map $arg_v $asset_immutable {
    "" "";
    default "immutable";
}


server {
    listen 80;
    listen [::]:80;
    server_name nextcloud.example.com;
    access_log off;
    error_log off;

    # Prevent nginx HTTP Server Detection
    server_tokens off;

    # Enforce HTTPS
    return 301 https://$server_name$request_uri;
}

server {
    listen 443      ssl http2;
    listen [::]:443 ssl http2;
    server_name nextcloud.example.com;
    access_log off;
    error_log off;

    # Path to the root of your installation
    root /var/www/html;

    # Use Mozilla's guidelines for SSL/TLS settings
    # https://mozilla.github.io/server-side-tls/ssl-config-generator/
    ssl_certificate     /etc/letsencrypt/live/nextcloud.example.com/fullchain.pem;
    ssl_certificate_key /etc/letsencrypt/live/nextcloud.example.com/privkey.pem;

    # Prevent nginx HTTP Server Detection
    server_tokens off;

    # HSTS settings
    # WARNING: Only add the preload option once you read about
    # the consequences in https://hstspreload.org/. This option
    # will add the domain to a hardcoded list that is shipped
    # in all major browsers and getting removed from this list
    # could take several months.
    #add_header Strict-Transport-Security "max-age=15768000; includeSubDomains; preload;" always;

    # set max upload size and increase upload timeout:
    client_max_body_size 512M;
    client_body_timeout 300s;
    fastcgi_buffers 64 4K;

    # Enable gzip but do not remove ETag headers
    gzip on;
    gzip_vary on;
    gzip_comp_level 4;
    gzip_min_length 256;
    gzip_proxied expired no-cache no-store private no_last_modified no_etag auth;
    gzip_types application/atom+xml application/javascript application/json application/ld+json application/manifest+json application/rss+xml application/vnd.geo+json application/vnd.ms-fontobject application/wasm application/x-font-ttf application/x-web-app-manifest+json application/xhtml+xml application/xml font/opentype image/bmp image/svg+xml image/x-icon text/cache-manifest text/css text/plain text/vcard text/vnd.rim.location.xloc text/vtt text/x-component text/x-cross-domain-policy;

    # Pagespeed is not supported by Nextcloud, so if your server is built
    # with the `ngx_pagespeed` module, uncomment this line to disable it.
    #pagespeed off;

    # The settings allows you to optimize the HTTP2 bandwitdth.
    # See https://blog.cloudflare.com/delivering-http-2-upload-speed-improvements/
    # for tunning hints
    client_body_buffer_size 512k;

    # HTTP response headers borrowed from Nextcloud `.htaccess`
    add_header Referrer-Policy                      "no-referrer"   always;
    add_header X-Content-Type-Options               "nosniff"       always;
    add_header X-Download-Options                   "noopen"        always;
    add_header X-Frame-Options                      "SAMEORIGIN"    always;
    add_header X-Permitted-Cross-Domain-Policies    "none"          always;
    add_header X-Robots-Tag                         "none"          always;
    add_header X-XSS-Protection                     "1; mode=block" always;

    # Remove X-Powered-By, which is an information leak
    fastcgi_hide_header X-Powered-By;

    # Specify how to handle directories -- specifying `/index.php$request_uri`
    # here as the fallback means that Nginx always exhibits the desired behaviour
    # when a client requests a path that corresponds to a directory that exists
    # on the server. In particular, if that directory contains an index.php file,
    # that file is correctly served; if it doesn't, then the request is passed to
    # the front-end controller. This consistent behaviour means that we don't need
    # to specify custom rules for certain paths (e.g. images and other assets,
    # `/updater`, `/ocm-provider`, `/ocs-provider`), and thus
    # `try_files $uri $uri/ /index.php$request_uri`
    # always provides the desired behaviour.
    index index.php index.html /index.php$request_uri;

    # Rule borrowed from `.htaccess` to handle Microsoft DAV clients
    location = / {
        if ( $http_user_agent ~ ^DavClnt ) {
            return 302 /remote.php/webdav/$is_args$args;
        }
    }

    location = /robots.txt {
        allow all;
        log_not_found off;
        access_log off;
    }

    # Make a regex exception for `/.well-known` so that clients can still
    # access it despite the existence of the regex rule
    # `location ~ /(\.|autotest|...)` which would otherwise handle requests
    # for `/.well-known`.
    location ^~ /.well-known {
        # The rules in this block are an adaptation of the rules
        # in `.htaccess` that concern `/.well-known`.

        location = /.well-known/carddav { return 301 /remote.php/dav/; }
        location = /.well-known/caldav  { return 301 /remote.php/dav/; }

        location /.well-known/acme-challenge    { try_files $uri $uri/ =404; }
        location /.well-known/pki-validation    { try_files $uri $uri/ =404; }

        # Let Nextcloud's API for `/.well-known` URIs handle all other
        # requests by passing them to the front-end controller.
        return 301 /index.php$request_uri;
    }

    # Rules borrowed from `.htaccess` to hide certain paths from clients
    location ~ ^/(?:build|tests|config|lib|3rdparty|templates|data)(?:$|/)  { return 404; }
    location ~ ^/(?:\.|autotest|occ|issue|indie|db_|console)                { return 404; }

    # Ensure this block, which passes PHP files to the PHP process, is above the blocks
    # which handle static assets (as seen below). If this block is not declared first,
    # then Nginx will encounter an infinite rewriting loop when it prepends `/index.php`
    # to the URI, resulting in a HTTP 500 error response.
    location ~ \.php(?:$|/) {
        # Required for legacy support
        rewrite ^/(?!index|remote|public|cron|core\/ajax\/update|status|ocs\/v[12]|updater\/.+|oc[ms]-provider\/.+|.+\/richdocumentscode\/proxy) /index.php$request_uri;

        fastcgi_split_path_info ^(.+?\.php)(/.*)$;
        set $path_info $fastcgi_path_info;

        try_files $fastcgi_script_name =404;

        include fastcgi_params;
        fastcgi_param SCRIPT_FILENAME $document_root$fastcgi_script_name;
        fastcgi_param PATH_INFO $path_info;
        fastcgi_param HTTPS on;

        fastcgi_param modHeadersAvailable true;         # Avoid sending the security headers twice
        fastcgi_param front_controller_active true;     # Enable pretty urls
        fastcgi_pass php-handler;

        fastcgi_intercept_errors on;
        fastcgi_request_buffering off;

        fastcgi_max_temp_file_size 0;
    }

    location ~ \.(?:css|js|svg|gif|png|jpg|ico|wasm|tflite|map)$ {
        try_files $uri /index.php$request_uri;
        add_header Cache-Control "public, max-age=15778463, $asset_immutable";
        access_log off;     # Optional: Don't log access to assets

        location ~ \.wasm$ {
            default_type application/wasm;
        }
    }

    location ~ \.woff2?$ {
        try_files $uri /index.php$request_uri;
        expires 7d;         # Cache-Control policy borrowed from `.htaccess`
        access_log off;     # Optional: Don't log access to assets
    }

    # Rule borrowed from `.htaccess`
    location /remote {
        return 301 /remote.php$request_uri;
    }

    location / {
        try_files $uri $uri/ /index.php$request_uri;
    }
}
Save and exit.
Enable the virtual host and test the configuration, and make sure there is no error.
sudo ln -s /etc/nginx/sites-available/nextcloud /etc/nginx/sites-enabled/
nginx -t
Modify the nginx service to wait 60 seconds before running.
[Service]
Type=forking
PIDFile=/run/nginx.pid
ExecStartPre=/bin/sleep 60 ; /usr/sbin/nginx -t -q -g 'daemon on; master_proces>
ExecStart=/usr/sbin/nginx -g 'daemon on; master_process on;'
ExecReload=/usr/sbin/nginx -g 'daemon on; master_process on;' -s reload
ExecStop=-/sbin/start-stop-daemon --quiet --stop --retry QUIT/5 --pidfile /run/>
TimeoutStopSec=5
KillMode=mixed
Now restart PHP7.4-FPM service and nginx service using the systemctl command below.
sudo systemctl restart nginx
sudo systemctl restart php7.4-fpm
The Nginx virtual host configuration for nextcloud has been created. If you’re using your own domain, then you will need to add it to the list of trusted domains in Nextcloud by editing /var/www/html/config/config.php. Now you should be able to see the Nextcloud login page when you visit your domain in your browser.
Next, modify the samba service to wait 20 seconds before running.
[Unit]
Description=Samba SMB Daemon
Documentation=man:smbd(8) man:samba(7) man:smb.conf(5)
Wants=network-online.target
After=network.target network-online.target nmbd.service winbind.service

[Service]
Type=notify
PIDFile=/run/samba/smbd.pid
LimitNOFILE=16384
EnvironmentFile=-/etc/default/samba
ExecStartPre=/bin/sleep 20 ; /usr/share/samba/update-apparmor-samba-profile
ExecStart=/usr/sbin/smbd --foreground --no-process-group $SMBDOPTIONS
ExecReload=/bin/kill -HUP $MAINPID
LimitCORE=infinity

[Install]
WantedBy=multi-user.target
Now we can install APCu and Redis for memory caching in Nextcloud:
$ sudo apt install php-apcu redis-server php-redis
$ sudo service nginx restart
Next, edit the configuration file:
$ sudo nano /etc/redis/redis.conf
Hit Ctrl+W to search “port” and change port 6379 to port 0. Then hit Ctrl+W to search for and uncomment:
unixsocket /var/run/redis/redis-server.sock
Change unixsocketperm 700 to unixsocketperm 770
Hit Ctrl+X, then ‘Y’ to save and exit. Now reboot and check if redis-server.sock exists in the /var/run/redis folder.
Next, add the Redis user redis to the www-data group.
$ sudo usermod -a -G redis www-data
Modify the redis service to wait 10 seconds and then run as the redis user and www-data group.
[Service]
Type=notify
ExecStartPre=/bin/sleep 10
ExecStart=/usr/bin/redis-server /etc/redis/redis.conf --supervised systemd --daemonize no
PIDFile=/run/redis/redis-server.pid
TimeoutStopSec=0
Restart=always
User=redis
Group=www-data
RuntimeDirectory=redis
RuntimeDirectoryMode=2755
Then, restart Nginx.
$ sudo service nginx restart
Start Redis server.
$ sudo service redis-server start
Add the caching configuration to the Nextcloud config file.
$ sudo nano /var/www/html/config/config.php
Add the following right after the last line and before the ‘);’
(before the last parenthesis and semicolon)
'memcache.local' => '\OC\Memcache\APCu',
'distributed' => '\\OC\\Memcache\\Redis',
'memcache.locking' => '\\OC\\Memcache\\Redis',
'filelocking.enabled' => 'true',
'redis' =>
  array (
  'host' => '/var/run/redis/redis-server.sock',
  'port' => 0,
  'timeout' => 0.0,
),
Hit Ctrl+X, then ‘Y’ to save and exit.
To verify Redis is enabled to start on boot:
$ sudo systemctl enable redis-server
Last, we make some changes to the php.ini file.
memory_limit = 512M
upload_max_filesize = 200M
max_execution_time = 360
post_max_size = 200M
date.timezone = America/Los_Angeles
You can also add a scheduled Cron to back up your Nextcloud contacts and calendar by going to Webmin > System > Scheduled Cron Jobs and creating a new scheduled cron job with the following command:
wget --directory-prefix=/tmp/nc-backup --user=nextcloud_user --password=nextcloud_password --timestamping https://nextcloud.example.com/remote.php/dav/calendars/nextcloud_user/personal-1?export https://nextcloud.example.com/remote.php/dav/addressbooks/users/nextcloud_user/contacts?export && mv /tmp/nc-backup/personal-1?export /path/to/backup/folder/calendar_$(date +'\%m-\%d-\%Y').ics && mv /tmp/nc-backup/contacts?export /path/to/backup/folder/contacts_$(date +'\%m-\%d-\%Y').vcf && find /path/to/backup/folder -type f -mtime +90 -delete
Install Syncthing
Install Syncthing with the command:
sudo apt-get install syncthing
By default, Syncthing runs on port 8384. In order to serve multiple users, each user has to have a dedicated instance of Syncthing listening on a unique port. I found it easier to assign each user a port in 8390+ range re-using the last digit of user’s UID. The following sequence of commands would make it easier for you to automate the process of creating new instances. Note, that you might need to tweak it if your setup uses multiple IP addresses, or your users’ UIDs are not in the 1000-1009 range.
sudo -s -u <username>
cd
user=$(whoami)
sudo systemctl start syncthing@$user.service
sudo systemctl stop syncthing@$user.service
ip_address=$(hostname -I | xargs)
port=$(echo $UID | sed s/^100/839/)
sed -i "s/127\.0\.0\.1:8384/$ip_address:$port/" ~/.config/syncthing/config.xml
sudo systemctl enable syncthing@$user.service
sudo systemctl start syncthing@$user.service
exit
Open web panel at http://$ip_address:$port and protect future access with login and password.
Third Party Webmin Modules
Install Nginx Webmin Module by going to Webmin > Webmin Configuration > Webmin Modules and entering https://www.justindhoffman.com/sites/justindhoffman.com/files/nginx-0.10.wbm_.gz for third party module. This module requires the libhtml-parser-perl package to be installed.
Install APC UPS Webmin Module by going to Webmin > Webmin Configuration > Webmin Modules and entering http://diego.caravana.to/wp-content/apcupsd0.812.wbm.gz for third party module. This module requires the apcupsd and apcupsd-cgi packages to be installed.
The concise commands that need to be executed are:
sudo apt-get -y install apcupsdsudo cp /etc/apcupsd/apcupsd.conf /etc/apcupsd/apcupsd.conf.baksudo nano /etc/apcupsd/apcupsd.conf- <alter the file appropriate to your needs and configuration>
sudo cp /etc/default/apcupsd /etc/default/apcupsd.baksudo nano /etc/default/apcupsd- alter the file like this
ISCONFIGURED=yes
- alter the file like this
sudo systemctl stop apcupsdsudo systemctl start apcupsdsudo apcaccess status(needs to be running but some install quirk has it running but not responding so you have to turn it off and back on before this command works)sudo systemctl stop apcupsdsudo apctest(needs to be stopped for this command to work)sudo apt-get install apcupsd-cgisudo cp /usr/lib/cgi-bin/apcupsd/*.cgi /etc/apcupsd/
The following is a sample of apcupsd.conf that you can use:
## apcupsd.conf v1.1 ##
#
#  for apcupsd release 3.14.12 (29 March 2014) - debian
#
# "apcupsd" POSIX config file

#
# ========= General configuration parameters ============
#

# UPSNAME xxx
#   Use this to give your UPS a name in log files and such. This
#   is particulary useful if you have multiple UPSes. This does not
#   set the EEPROM. It should be 8 characters or less.
UPSNAME Smrt1500

# UPSCABLE
#   Defines the type of cable connecting the UPS to your computer.
#
#   Possible generic choices for  are:
#     simple, smart, ether, usb
#
#   Or a specific cable model number may be used:
#     940-0119A, 940-0127A, 940-0128A, 940-0020B,
#     940-0020C, 940-0023A, 940-0024B, 940-0024C,
#     940-1524C, 940-0024G, 940-0095A, 940-0095B,
#     940-0095C, 940-0625A, M-04-02-2000
#
UPSCABLE usb

# To get apcupsd to work, in addition to defining the cable
# above, you must also define a UPSTYPE, which corresponds to
# the type of UPS you have (see the Description for more details).
# You must also specify a DEVICE, sometimes referred to as a port.
# For USB UPSes, please leave the DEVICE directive blank. For
# other UPS types, you must specify an appropriate port or address.
#
# UPSTYPE   DEVICE           Description
# apcsmart  /dev/tty**       Newer serial character device, appropriate for
#                            SmartUPS models using a serial cable (not USB).
#
# usb                 Most new UPSes are USB. A blank DEVICE
#                            setting enables autodetection, which is
#                            the best choice for most installations.
#
# net       hostname:port    Network link to a master apcupsd through apcupsd's
#                            Network Information Server. This is used if the
#                            UPS powering your computer is connected to a
#                            different computer for monitoring.
#
# snmp      hostname:port:vendor:community
#                            SNMP network link to an SNMP-enabled UPS device.
#                            Hostname is the ip address or hostname of the UPS
#                            on the network. Vendor can be can be "APC" or
#                            "APC_NOTRAP". "APC_NOTRAP" will disable SNMP trap
#                            catching; you usually want "APC". Port is usually
#                            161. Community is usually "private".
#
# netsnmp   hostname:port:vendor:community
#                            OBSOLETE
#                            Same as SNMP above but requires use of the
#                            net-snmp library. Unless you have a specific need
#                            for this old driver, you should use 'snmp' instead.
#
# dumb      /dev/tty**       Old serial character device for use with
#                            simple-signaling UPSes.
#
# pcnet     ipaddr:username:passphrase:port
#                            PowerChute Network Shutdown protocol which can be
#                            used as an alternative to SNMP with the AP9617
#                            family of smart slot cards. ipaddr is the IP
#                            address of the UPS management card. username and
#                            passphrase are the credentials for which the card
#                            has been configured. port is the port number on
#                            which to listen for messages from the UPS, normally
#                            3052. If this parameter is empty or missing, the
#                            default of 3052 will be used.
#
# modbus    /dev/tty**       Serial device for use with newest SmartUPS models
#                            supporting the MODBUS protocol.
#
UPSTYPE usb
DEVICE

# POLLTIME
#   Interval (in seconds) at which apcupsd polls the UPS for status. This
#   setting applies both to directly-attached UPSes (UPSTYPE apcsmart, usb,
#   dumb) and networked UPSes (UPSTYPE net, snmp). Lowering this setting
#   will improve apcupsd's responsiveness to certain events at the cost of
#   higher CPU utilization. The default of 60 is appropriate for most
#   situations.
POLLTIME 60

# LOCKFILE
#   Path for device lock file. Not used on Win32.
LOCKFILE /var/lock

# SCRIPTDIR
#   Directory in which apccontrol and event scripts are located.
SCRIPTDIR /etc/apcupsd

# PWRFAILDIR
#   Directory in which to write the powerfail flag file. This file
#   is created when apcupsd initiates a system shutdown and is
#   checked in the OS halt scripts to determine if a killpower
#   (turning off UPS output power) is required.
PWRFAILDIR /etc/apcupsd

# NOLOGINDIR
#   Directory in which to write the nologin file. The existence
#   of this flag file tells the OS to disallow new logins.
NOLOGINDIR /etc

#
# ======== Configuration parameters used during power failures ==========
#

# The ONBATTERYDELAY is the time in seconds from when a power failure
#   is detected until we react to it with an onbattery event.
#
#   This means that, apccontrol will be called with the powerout argument
#   immediately when a power failure is detected.  However, the
#   onbattery argument is passed to apccontrol only after the
#   ONBATTERYDELAY time.  If you don't want to be annoyed by short
#   powerfailures, make sure that apccontrol powerout does nothing
#   i.e. comment out the wall.
#ONBATTERYDELAY 6

#
# Note: BATTERYLEVEL, MINUTES, and TIMEOUT work in conjunction, so
# the first that occurs will cause the initation of a shutdown.
#

# If during a power failure, the remaining battery percentage
# (as reported by the UPS) is below or equal to BATTERYLEVEL,
# apcupsd will initiate a system shutdown.
BATTERYLEVEL 5

# If during a power failure, the remaining runtime in minutes
# (as calculated internally by the UPS) is below or equal to MINUTES,
# apcupsd, will initiate a system shutdown.
MINUTES 5

# If during a power failure, the UPS has run on batteries for TIMEOUT
# many seconds or longer, apcupsd will initiate a system shutdown.
# A value of 0 disables this timer.
#
#  Note, if you have a Smart UPS, you will most likely want to disable
#    this timer by setting it to zero. That way, you UPS will continue
#    on batteries until either the % charge remaing drops to or below BATTERYLEVEL,
#    or the remaining battery runtime drops to or below MINUTES.  Of course,
#    if you are testing, setting this to 60 causes a quick system shutdown
#    if you pull the power plug.
#  If you have an older dumb UPS, you will want to set this to less than
#    the time you know you can run on batteries.
TIMEOUT 0

#  Time in seconds between annoying users to signoff prior to
#  system shutdown. 0 disables.
ANNOY 300

# Initial delay after power failure before warning users to get
# off the system.
ANNOYDELAY 60

# The condition which determines when users are prevented from
# logging in during a power failure.
# NOLOGON  [ disable | timeout | percent | minutes | always ]
NOLOGON disable

# If KILLDELAY is non-zero, apcupsd will continue running after a
# shutdown has been requested, and after the specified time in
# seconds attempt to kill the power. This is for use on systems
# where apcupsd cannot regain control after a shutdown.
# KILLDELAY   0 disables
KILLDELAY 0

#
# ==== Configuration statements for Network Information Server ====
#

# NETSERVER [ on | off ] on enables, off disables the network
#  information server. If netstatus is on, a network information
#  server process will be started for serving the STATUS and
#  EVENT data over the network (used by CGI programs).
NETSERVER on

# NISIP
#  IP address on which NIS server will listen for incoming connections.
#  This is useful if your server is multi-homed (has more than one
#  network interface and IP address). Default value is 0.0.0.0 which
#  means any incoming request will be serviced. Alternatively, you can
#  configure this setting to any specific IP address of your server and
#  NIS will listen for connections only on that interface. Use the
#  loopback address (127.0.0.1) to accept connections only from the
#  local machine.
NISIP 127.0.0.1

# NISPORT  default is 3551 as registered with the IANA
#  port to use for sending STATUS and EVENTS data over the network.
#  It is not used unless NETSERVER is on. If you change this port,
#  you will need to change the corresponding value in the cgi directory
#  and rebuild the cgi programs.
NISPORT 3551

# If you want the last few EVENTS to be available over the network
# by the network information server, you must define an EVENTSFILE.
EVENTSFILE /var/log/apcupsd.events

# EVENTSFILEMAX
#  By default, the size of the EVENTSFILE will be not be allowed to exceed
#  10 kilobytes.  When the file grows beyond this limit, older EVENTS will
#  be removed from the beginning of the file (first in first out).  The
#  parameter EVENTSFILEMAX can be set to a different kilobyte value, or set
#  to zero to allow the EVENTSFILE to grow without limit.
EVENTSFILEMAX 10

#
# ========== Configuration statements used if sharing =============
#            a UPS with more than one machine

#
# Remaining items are for ShareUPS (APC expansion card) ONLY
#

# UPSCLASS [ standalone | shareslave | sharemaster ]
#   Normally standalone unless you share an UPS using an APC ShareUPS
#   card.
UPSCLASS standalone

# UPSMODE [ disable | share ]
#   Normally disable unless you share an UPS using an APC ShareUPS card.
UPSMODE disable

#
# ===== Configuration statements to control apcupsd system logging ========
#

# Time interval in seconds between writing the STATUS file; 0 disables
STATTIME 0

# Location of STATUS file (written to only if STATTIME is non-zero)
STATFILE /var/log/apcupsd.status

# LOGSTATS [ on | off ] on enables, off disables
# Note! This generates a lot of output, so if
#       you turn this on, be sure that the
#       file defined in syslog.conf for LOG_NOTICE is a named pipe.
#  You probably do not want this on.
LOGSTATS off

# Time interval in seconds between writing the DATA records to
#   the log file. 0 disables.
DATATIME 0

# FACILITY defines the logging facility (class) for logging to syslog.
#          If not specified, it defaults to "daemon". This is useful
#          if you want to separate the data logged by apcupsd from other
#          programs.
#FACILITY DAEMON

#
# ========== Configuration statements used in updating the UPS EPROM =========
#

#
# These statements are used only by apctest when choosing "Set EEPROM with conf
# file values" from the EEPROM menu. THESE STATEMENTS HAVE NO EFFECT ON APCUPSD.
#

# UPS name, max 8 characters
#UPSNAME UPS_IDEN

# Battery date - 8 characters
#BATTDATE mm/dd/yy

# Sensitivity to line voltage quality (H cause faster transfer to batteries)
# SENSITIVITY H M L        (default = H)
#SENSITIVITY H

# UPS delay after power return (seconds)
# WAKEUP 000 060 180 300   (default = 0)
#WAKEUP 60

# UPS Grace period after request to power off (seconds)
# SLEEP 020 180 300 600    (default = 20)
#SLEEP 180

# Low line voltage causing transfer to batteries
# The permitted values depend on your model as defined by last letter
#  of FIRMWARE or APCMODEL. Some representative values are:
#    D 106 103 100 097
#    M 177 172 168 182
#    A 092 090 088 086
#    I 208 204 200 196     (default = 0 => not valid)
#LOTRANSFER  208

# High line voltage causing transfer to batteries
# The permitted values depend on your model as defined by last letter
#  of FIRMWARE or APCMODEL. Some representative values are:
#    D 127 130 133 136
#    M 229 234 239 224
#    A 108 110 112 114
#    I 253 257 261 265     (default = 0 => not valid)
#HITRANSFER 253

# Battery charge needed to restore power
# RETURNCHARGE 00 15 50 90 (default = 15)
#RETURNCHARGE 15

# Alarm delay
# 0 = zero delay after pwr fail, T = power fail + 30 sec, L = low battery, N = never
# BEEPSTATE 0 T L N        (default = 0)
#BEEPSTATE T

# Low battery warning delay in minutes
# LOWBATT 02 05 07 10      (default = 02)
#LOWBATT 2

# UPS Output voltage when running on batteries
# The permitted values depend on your model as defined by last letter
#  of FIRMWARE or APCMODEL. Some representative values are:
#    D 115
#    M 208
#    A 100
#    I 230 240 220 225     (default = 0 => not valid)
#OUTPUTVOLTS 230

# Self test interval in hours 336=2 weeks, 168=1 week, ON=at power on
# SELFTEST 336 168 ON OFF  (default = 336)
#SELFTEST 336
Set up Folder2ram:
$ sudo find /bin /dev /etc /home /lib /mnt /opt /root /sbin /srv /tmp /usr /var -cmin -5 (to see which folders are being accessed the most.)
$ sudo wget -O /sbin/folder2ram https://raw.githubusercontent.com/bobafetthotmail/folder2ram/master/debian_package/sbin/folder2ram
$ sudo chmod +x /sbin/folder2ram
$ sudo folder2ram -configure
$ sudo folder2ram -mountall
$ sudo folder2ram -enablesystemd (if system is using systemd) or
$ sudo folder2ram -enableinit (if system is not using systemd)
Here is a sample Folder2ram configuration:
tmpfs           /var/log
tmpfs           /etc/webmin
tmpfs           /usr/share/webmin
tmpfs           /var/webmin
tmpfs           /var/lib/php
tmpfs           /var/lib/mysql
tmpfs           /var/log/samba
tmpfs           /var/log/nginx
tmpfs           /var/log/journal
If you have a 3D printer, then print out this really awesome NAS case for your Raspberry Pi 4. Be sure to send a donation to the creator because he really put in a lot of time and effort to design it!
References
https://www.webmin.com/deb.html
https://ixnfo.com/en/install-and-configure-tftpd-hpa.html
https://iot4beginners.com/how-to-setup-an-nginx-server-on-raspberry-pi
https://www.howtoforge.com/tutorial/ubuntu-nginx-nextcloud
https://docs.nextcloud.com/server/latest/admin_manual/installation/nginx.html
https://paulphilippov.com/articles/how-to-install-syncthing-on-a-debian-server-to-serve-multiple-users
https://sites.google.com/view/ubuntuserver16-04/install-your-distro-to-build-your-base-server/put-the-apc-monitoring-module-in-webmin
https://doxfer.webmin.com/Webmin/System_and_Server_Status
https://github.com/bobafetthotmail/folder2ram
https://www.serverpronto.com/kb/page.php?id=Setting+FTP+access+using+Webmin+%26+SSH
https://www.youtube.com/watch?v=d3eBVmcJ7s0
https://docs.nextcloud.com/server/19/admin_manual/configuration_server/caching_configuration.html